Solenis' Model Decompiler Tutorial
Ok, so this stuff may be pretty obvious, but I like making tutorials. This tutorial will explain how to decompile Vampire models using CannonFodder's model decompiler and then to import them into 3DSMax using his import tools. I'll also include how to grab the textures.
Tools needed for this tutorial:
You'll also need some version of 3DSMax, preferably 5.0 or above; the tools work for 4.2, but not without a few small hitches.
For the purposes of this tutorial I will assume that you have unpacked all the VPK files already. If you haven't, be sure that you've extracted all four pieces of the model you're interesting in importing so that the model decompiler can get to them.
Note for HL2 users: You must place the mdldecompiler in your Program Files\Valve\Steam\Steamapps\(username)\sourcesdk\bin\ folder, or it won't be able to work with the GCFs to extract HL2 models.
Locating and decompiling the model.
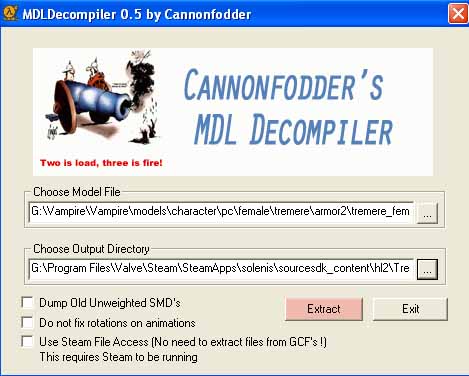
- Open up the model decompiler. Browse to the directory that contains the model you'd like to decompile (and its accompanying files).
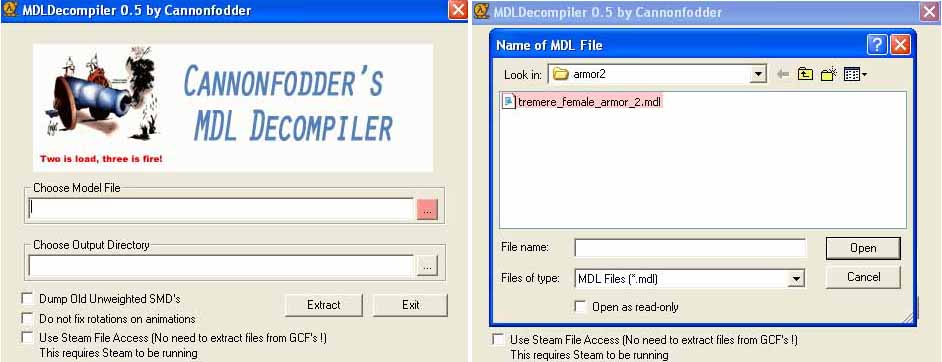
- Choose the location you'd like to extract it to. I recommend creating a separate folder for each model you'd like to extract. You can do that beforehand or from within the decompiler.
- Extract the file.
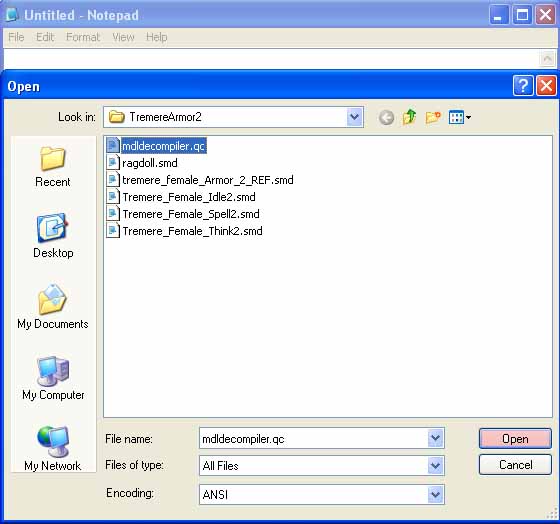
This will extract the reference.smd, the ragdoll.smd and .smds for any built-in animations that come with the model. Unfortunately, those built-in animations don't work with the current version of the model decompiler. The decompiler will also build a .qc file that tells the HL2 model builder how to construct the model, if you're intending to pull it into HL2. The .SMD files are just the model and do not include the textures.
Locating and extracting the textures.
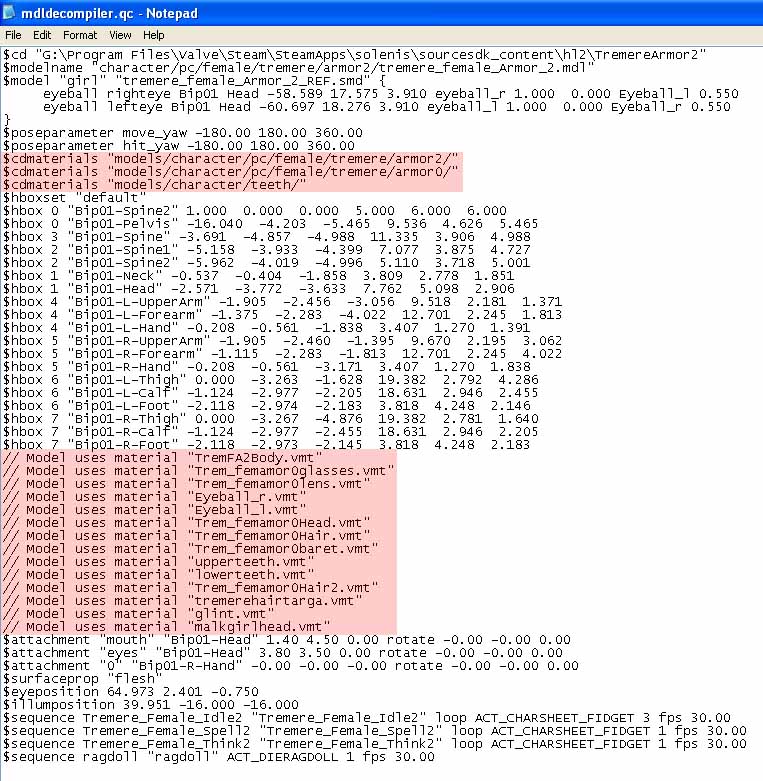
- Using Notepad, open up the .qc file that the model decompiler created for you. Among other things, the .qc file contains a list of all the textures the model is actively using and the directories in which those textures are located.

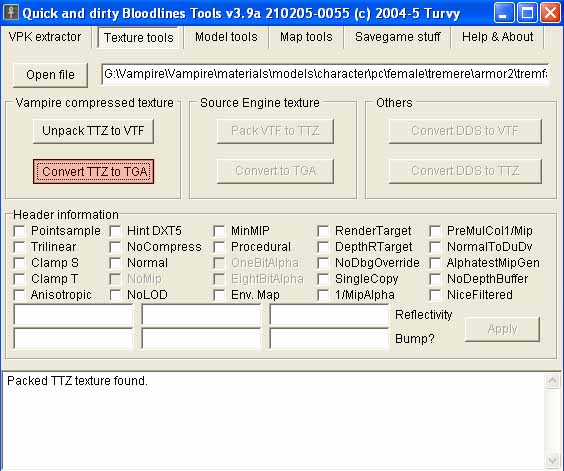
- Open up Turfster's VPK Tool and choose "Texture Tools". Click "Open File" and browse to the first path that was indicated in the .qc file. Most of the model textures are going to be under Vampire\materials\models\etc; you may have to go to a separate directory to get the teeth/hands/eyes. Also, if you're extracting for a player character (PC), you may have to go to the Armor0 directory to get the basic body textures, etc.
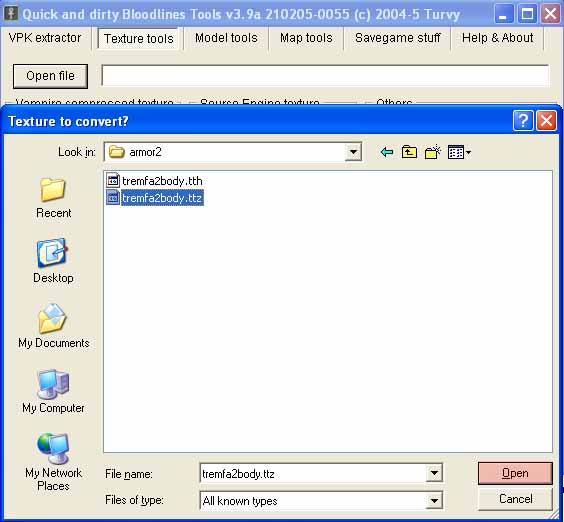
- For each texture you'll need to choose its corresponding .ttz file and then "Convert TTZ to TGA". You'll have to do them one at a time, but most models don't have more than 15 or so textures so it won't take too long. This program automatically puts the .tga into the same directory as the original .ttz, so be sure you go down your list when you're collecting them so you don't miss any. It would be best if you put these all in a single directory that will be easy for 3DS Max to get to. If you like you can dump them into the same folder that your .SMDs are in.
Now you're ready to put everything together in 3DSMax for your modeling and animating enjoyment.
Importing into 3DSMax.
- After installing the .SMD importer and exporter (see link above), open up 3DS Max.
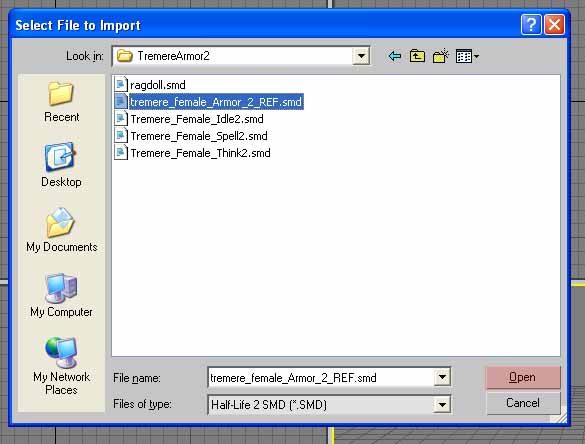
- Click on File and choose Import. Browse to your reference .SMD and import it, making sure all the boxes are checked.
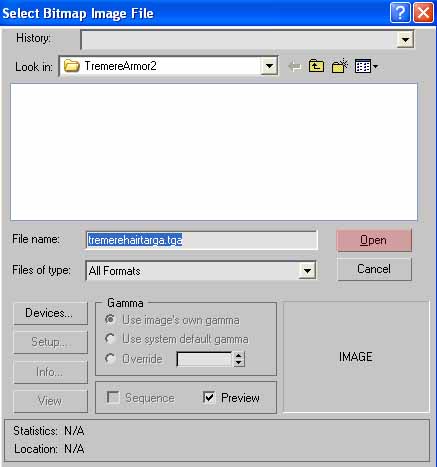
- It will prompt you for the textures. Direct the browse window to the directory into which you extracted those textures, and it should pick them up.
You should now have a fully textured model in 3DS Max for you to do with as you please. Please direct any questions/comments/corrections to solenis@ifcommand.com.